
Table of contents
- Introduction
- The aggregate variables function and its arguments
- Aggregating variables using the command line
- Aggregating variables using the GUI
Introduction
When performing analyses, sometimes some of the variables need to be aggregated before used. The lsa.aggregate.vars aggregates continuous variables in large-scale assessments’ data. The aggregation can be done by groups defined by the group.vars. Multiple grouping variables can be specified. All aggregations are done within each country separately.
The aggregate variables function and its arguments
The lsa.aggregate.vars function has the following arguments:
data.file– The file containinglsa.dataobject. Either this ordata.objectshall be specified, but not both.data.object– The object in the memory containinglsa.dataobject. Either this ordata.fileshall be specified, but not both.group.vars– Variable(s) to aggregate thesrc.variablesby. If no grouping variables are provided, thesrc.variableswill be aggregated on country level. See details.src.variables– Names of the variables to aggregate. Accepts only continuous variables. No PV variables are accepted. See details.new.variables– The names of the new, aggregated variables to append to the dataset. See details.new.var.labels– Optional, vector of strings to add as variable labels for thenew.variables. See details.aggr.fun– Function to apply when aggregating the variables. Acceptsmean(default),median, ormode. See details.out.file– Full path to the.RDatafile to be written. If missing, the original object will be written in the memory.
Notes:
- The function will accept only continuous background variables in
src.variables. If factor (i.e. categorical) or PVs are supplied, the function will stop with an error. - If the names in
new.variablesare the same as the names insrc.variables, the function will stop with an error, as overwriting any existing variables in the data set is not permitted. - Multiple variables can be passed to
group.vars. However, these need to be used sparingly, as for some of the combination of grouping variables there may not be enough cases to aggregate over. - If no names are provided to the
new.variables, the function will create the names, using the names passed tosrc.variables, appendingAGGRat their end. - If no
output.fileis provided, the data with the new aggregated variables will be written to memory from where it can be used by any other function in RALSA. - If the variable names defined in
new.variablesalready exist in the data, the function will stop with an error.
Aggregating variables using the command line
In the examples that follow we will merge a new data file (see how to merge files here) with student and school principal data from PIRLS 2016 (Australia and Slovenia), taking all variables from both file types:
lsa.merge.data(inp.folder = "C:/temp",
               file.types = list(acg = NULL, asg = NULL),
               ISO = c("aus", "svn"),
               out.file = "C:/temp/merged/PIRLS_2016_ACG_ASG_merged.RData")
Let’s aggregate the Students Like Reading (ASBGSLR) and Home Resources for Learning (ASBGHRL) scales by school. Both of these are continuous variables with center point of 10 and standard deviation of 2. The syntax for doing this is presented below.
lsa.aggregate.vars(data.file = "C:/temp/merged/PIRLS_2016_ACG_ASG_merged.RData",
                   src.variables = c("ASBGSLR", "ASBGHRL"),
                   group.vars = "IDSCHOOL",
                   new.var.labels = c("Aggregated STUDENTS LIKE READING/SCL",
                                      "Aggregated HOME RESOURCES FOR LEARNING/SCL"),
                   out.file = "/tmp/merged/PIRLS_2016_ACG_ASG_merged.RData")
Note that there were no names specified for the newly created, aggregated, variables. The function will create them automatically using the names in src.variables, appending AGGR at their end.
Aggregating variables using the GUI
To start the RALSA user interface, execute the following command in RStudio:
ralsaGUI()
For the examples that follow, merge a new file with PIRLS 2016 data for Australia and Slovenia (Slovenia, not Slovakia) taking all student and school principal variables. See how to merge data files here. You can name the merged file PIRLS_2016_ACG_ASG_merged.RData.
When done merging the data, select Data preparation > Aggregate variables from the menu on the left. When navigated to the Aggregate variables in the GUI, click on the Choose data file button. Navigate to the folder containing the merged PIRLS_2016_ACG_ASG_merged.RData file, select it and click the Select button.

Once the file is loaded, you will see the two panels with the available variables and selected variables (the latter is currently empty):
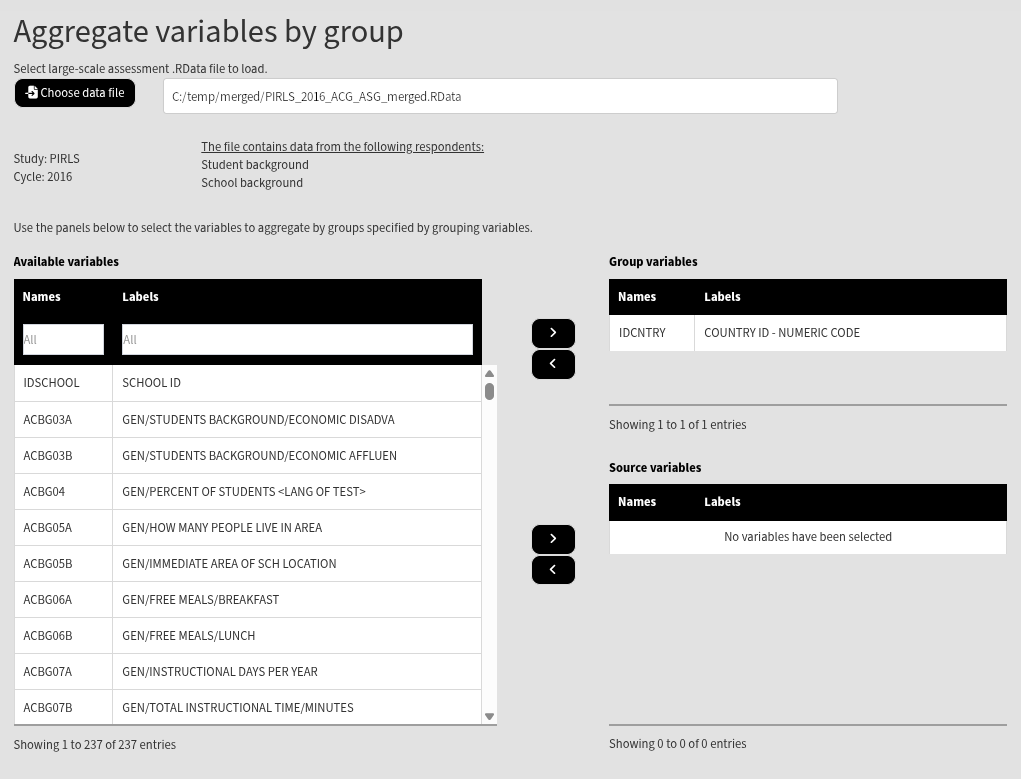
Select the IDSCHOOL variable (school ID) in the Available variables panel and move it in the Group variables panel using the arrow pointing on the right next to it. Use the filter boxes over the Available variables panel to filter the ASBGSLR and ASBGHRL variables. Click on them to select them and then use the arrow pointing to the right to move them to Source variables. After these settings have been made, a new panel appears underneath. For each variable in Source variables, a row for defining a new variable names and their labels will appear. When the GUI is used, new variable names must be defined. The variable labels for the new variables are optional, but if one of them is defined, then all of them must be defined. Note that new variable names and labels can be arbitrary, but should not repeat variable names that already exist in the data set.
After the new variable names and, optionally, labels are defined, another section appears underneath where the aggregation function (mean, median or mode) can be selected. For this example, the default (mean) is selected. At the bottom of the screen a Define the new output file name appears. Click on it and define the name and location of the new file name. For this example, we will just overwrite the original file we selected. The final settings in this section look like this:

The last step is to click on the Execute syntax button. The execution will start, the console will be displayed at the bottom of the GUI. You will see a message letting you know when all operations are done. Scroll down and check for any error or warning messages.
